• Skip to primary navigation
  • Skip to main content
  • Skip to primary sidebar
Gokul Deepak

Gokul Deepak

GoCool and Debug

  • Home
  • Terraform
  • WordPress
  • Android
  • How to
  • About Me

Blogger

Open Live Editor Review

June 28, 2017 by Gokul Deepak S Leave a Comment

I have been using WordPress for the past 10 years. Usually I will be writing small posts and so it was easy for me to post something in WordPress. But recently I have started to write some long essays and so I feel hard to edit in the WordPress. Even though WordPress editor is good and I have tried dozens of plugins for WYSIWYG. There was slight delay in loading the editor and it was not the fastest. I wanted to use some offline editor software or some applications which loads fast and easy to organize thousands of words. After a little search I started using Evernote. But there were lot of limitations in Evernote and so I have shifted to Google Docs which is % free unlike Evernote which is a freemium software.

Google Docs had some issues especially while cop paste content. The alignment of the text in WordPress was not the same as in Google Docs so it became a double time work to edit in google docs and to format in WordPress editor. Open Live Editor Review

Finally I have found Windows Live Editor. But the problem with windows live editor is no recent updates for the application. There was no support for it. I can’t find a solution for windows 10. So I have shifted to Open Live Editor.

Pros:

  • Easy Editing.
  • No Need To Save while typing. Text will be saved Automatically.
  • Need not have to save backup text separately.
  • WYSWYG
  • Supports Theme of our Blog so that you can get a preview of how it would look in our website.
  • Can Attach Picture, Video
  • Hyperlink supports to link our other posts
  • Can set Categories, Add Tags, Change Post Dates
  • Checks Spelling
  • Supports Multi Platform like WordPress.com, WordPress, Blogger, Typepad etc.
  • Supports Multi blog/ Website
  • Can Publish from the editor.
  • And beyond everything it is Free Free Free!!!

Cons:

Currently It supports only recent posts and not all the posts that we have posted in our Website/Blog. It would be nice If we can also edit old posts.

Does not counts number of words

By the way I’m Posting this using Open Live Editor

Filed Under: Blogger, Wordpress

How To Add Floating Facebook like box, Twitter Share, Google + box in blogger

August 29, 2016 by Gokul Deepak S Leave a Comment

Even Though there are many websites which explains about how to add floating facebook like box, twitter share box and google + box in blogger, I feel there was no clarity in any posts and also many failure rate was there.
I’m not only posting this to share with friends but also to remind myself how I did it.

How to add floating Facebook like box

  1. Go to Blogger Dashboard
  2. Go to Template –> Edit HTML
  3. Copy and paste this following text
You can put the code above right before the </body> tag of Blogger XHTML.

The position of the floating sharer will be relative to your blog size. So, you have to doodle with the top and left amount of pixels. If you want to put it on the right, you can change the word leftto right on the CSS codes (the codes inside the <style> and </style>).

You also can tinker and probably add another CSS styling to enhance the share buttons wrapper.

Even After using this code if facebook like box is not visible then it must be because of APP ID.
you should remove the facebook script from the above code. (<div id=”fb-root”>……)
Even after removing it if your blog doesn’t show facebook like box then it must be because there should be JavaScript SDK.
To add that
https://developers.facebook.com/docs/plugins/share-button
and type your website address in URL to share box and then select “Get Code”

add floating facebook like box javascript sdk
Paste the text which was highlighted by me in the blogger by following this method.
.
Using this code also gives me tips about hot to add a like button without using a URL and so the URL of current page will be automatically detected in the box. (I was searching for this but haven’t found at any websites/ Blogs)

Filed Under: Blogger Tagged With: How to

How to Show Only Post Title in Label Page

August 29, 2016 by Gokul Deepak S Leave a Comment

Sometimes we have show only post title in label page and in archive pages. I had a website for lyrics which should show only movie name list in the label page. so I have searched for this option and found this one.

This will save lot of space in the label page(a page after you clicked one of the label) and to boost the blog speed. Why? Because, usually if we want to find an article, and we didn’t find it in home page, we will search in label. But, if we click one of the label, we will be shown all of the content of each post in that label. So, we have to wait until the loading is complete. Long, right? So, the solution is, just follow the steps below.

Show Only Post Title in Label Page

How to Show Only Post Title In Label page:

  1. Go to blogger dashboard
  2. Go to Template –> Edit HTML
  3. Press ctrl+f to search for a text
  4. Then find <b:include data=’post’ name=’post’/>
  5. Replace the code above, with the code below.
    <b:if cond=’data:blog.homepageUrl != data:blog.url’>
    <b:if cond=’data:blog.pageType != &quot;item&quot;’>
    <a expr:href=’data:post.url’>
    <div style=’padding:6px 0 6px 5px;border-right:1.5px solid #000;border-bottom:1.5px solid #000;margin-bottom:2px;background:#E6E4E4;color:#000000;’><img alt=’&gt;&gt;&gt;’ border=’0′ src=’https://lh5.googleusercontent.com/-HP5XyclRQic/TXMMAKmlg5I/AAAAAAAAAQk/wrCGFu9jzmg/s1600/sidebar-icon.png’/>
    <data:post.title/></div></a>
    <b:else/>
    <b:include data=’post’ name=’post’/>
    </b:if>
    <b:else/>
    <b:include data=’post’ name=’post’/>
    </b:if>
    Customize:
    The Red code are the background color, you can edit or remove it
    The Blue code is the icon address
  6. Just click on Save Template

We have successfully changed code. Now go to a label page and test result.


————————————————
1) If you can’t find any text using ctrl+f just copy the text to notepad and then press ctrl+f and then paste it there.
2) If post contains any thumbnail images and if you want to show the thumbnails related to that post then replace this code instead of that Blue code
<img alt=’&gt;&gt;&gt;’ border=’0′ expr:src=’data:post.thumbnailUrl’/>
Click here to read more blogger tips

Filed Under: Blogger

How to Remove Powered By Blogger Attribution in Blogger

August 29, 2016 by Gokul Deepak S Leave a Comment

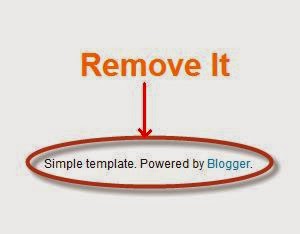
Every one of us does not like ‘Powered By Blogger’ Attribution shown in the footer of the blog created in blogger.com. So I have searched a lot to know how to remove powered by blogger attribution in blogger. Just sharing the solution which I have found by googling.

How to remove Powered by Blogger Attribution:

Mission: Remove Powered by Blogger Attribution in Blogger

Procedure:

Remove Powered by Blogger Attribution

Step 1: Go to Blogger Dashboard

Step 2: Click on Template

Step 3: Click on Edit HTML button.

Now change the true to false. Once you change the code will look like this:

Step 5: Save your template.
Remove Powered by Blogger Attribution
Step 6: Now Go to layout and find the attribution widget.

Step 7: Click on Edit on that attribution widget

Step 8: Now click on the Remove button.

Climax: Mission Successful.
Click here to know more Blogger Tips.

Filed Under: Blogger

How to Remove LinkWithin logo under ‘You Might Also Like’ widget in blogger

August 23, 2016 by Gokul Deepak S Leave a Comment

Let me explain How to remove LinkWithin logo under ‘You Might Also Like’ widget in blogger.  Look at the picture added below. This is how the Linkwithin link will be in the widget.
remove LinkWithin logo

Mission: to Remove LinkWithin logo

Platform: Blogger/Blogspot

Procedure:

Step 1: Go to Blogger.com

Step 2: Select Template -> Customize -> Advanced-> Add CSS

Step 3: Paste the following code in the custom CSS box

#linkwithin_logolink_0
{display:none;}

Extra Cover:

The code given above will work only for one post. That is if you are viewing a single post/page the linkwithin logo will be hidden but if a Archive page is listed then only one of the post won’t have linkwithin logo. All other posts will have linkwithin logo. To hide all such logos add the CSS given below instead of CSS given above.

->For Multiple post (Example:Archives, Labels):

#linkwithin_logolink_0,#linkwithin_logolink_1,#linkwithin_logolink_2,#linkwithin_logolink_3 {display:none;}

Step 4:  Hit Apply to Blog.

Climax: We have successfully removed linkwithin logo.

Filed Under: Blogger

How to redirect Blogspot to another site

August 12, 2016 by Gokul Deepak S Leave a Comment

This question was arisen within me when I have moved my blog from gokuldeepak.blogspot.com to Gokuldeepak.com (a Self hosted wordpress site). I needed an automatic redirector to redirect my blogspot.com domain to top level domain. Using this method we can even redirect the blogspot.com to any certain page. I have redirected http://adflyincometips.blogspot.com/ to How to increase adfly views page. There are lot of blogs which deals with this topic. Even though I’m trying to reproduce my own version, a simple 6 step method. Note that user visiting any of the post in our blog will be automatically redirected to another site so that it does not only redirects the home page but all pages. So there won’t be any pages to display in our blogspot.com

How to redirect Blogspot to another site:

Step 1: Login to Blogger.com dashboard.

Step 2: Select Template tab.

Step 3: Click Edit HTML

Step 4: Within top 10 lines you will find <head> tag.

Step 5: Below that <head> tag add the following code.

<script type=’text/javascript’>
var d='<data:blog.url/>’;
d=d.replace(/.*\/\/[^\/]*/, ”);
location.href = ‘http://gokuldeepak.com’;
</script>
 How to redirect Blogspot to another site

Step 6: replace http://gokuldeepak.com with your own url to which the blogspot blog have to be redirected.

Success: Successfully we have redirected blogger blog to another site automatically.

Hope this Post helps you to make change in rapid manner. I’f you are an advanced pro sorry. This blog won’t satisfy you since I’m focusing to explain only basic details in a simple manner for noobs. Even though if you comment below I would answer your complex questions too.

Filed Under: Blogger

Primary Sidebar

Popular Pages

  • Home
  • How to find the date of the Facebook group it was created
  • Yureka Yu Plus vs Lenovo K3 Note
  • How to Install Windows without GRUB rescue
  • How to Remove LinkWithin logo under 'You Might Also Like' widget in blogger

Archives

Categories

  • Android
  • Apache
  • AWS
  • Blogger
  • Computer Tips
  • DevOps
  • Docker
  • Earn
  • Facebook Tips
  • Git
  • Google Tips
  • Hosting
  • How to
  • Laptop Tips
  • Laptops
  • Linux
  • Mobile
  • MongoDB
  • Nginx
  • Node JS
  • Notepad++
  • PostgresQL
  • Terraform
  • Ubuntu
  • Wordpress
  • Xenforo

Tags

Android Android One AWS Bluehost Comparisions Custom ROM Elementor Facebook Genesis Genesis Sample Theme Google Drive How to Lineage OS Notes OnePlus One OwnCloud Rooting Smartphones Stock ROM Studiopress Tomcat Wordpress plugin

Copyright © 2025 · Maintained by GokulDeepak


Loading Comments...