• Skip to primary navigation
  • Skip to main content
  • Skip to primary sidebar
Gokul Deepak

Gokul Deepak

GoCool and Debug

  • Home
  • Terraform
  • WordPress
  • Android
  • How to
  • About Me

Gokul Deepak S

Install CM11 in Micromax Canvas A1

August 29, 2016 by Gokul Deepak S Leave a Comment

Micromax Canvas A1 (Android One) users got double treat as they can get both pure vanilla Android experience with Google’s stock ROMs, and assured third-party custom ROM releases such as CM11 and CM12 from the CyanogenMod team. So Now You can install CM11 in Micromax Canvas A1.

The CyanogenMod11 (CM11) ROM is very good as it gives very light and fast experience with options to choose themes, trebuchet launcher, default file manager, graphical music player and more.

Many users who are connected with internet got auto update of Lollipop. We will be enthusiastic for auto free update but after installing it we will be sad that lollipop is hard to use and not so attractive. Thats the reason many of us are rolling back to kitkat. but if you wish to install other than kitkat then you can choose CM11 without doubt as it also has same appearance and an easy to use interface. To roll back to Kitkat (Android 4.4.4) itself click here.

Now here we are going to see how to install CM11 in Micromax Canvas A1 by step by step.

Conditions:

  • The instructions given below is only for Android one users. especially Micromax Canvas A1 users as i have tried in that device personally.
  • Charge your device upto 80% so that battery may not drain while flashing ROM.
  • Backup all your contacts to google account or export .vcf file to memory card. Back up Whatsapp or any other messaging app to your SD card. If you are using applications like reminder or money lover backup those files too. After backing up all phone contents to SD card copy all files in SD card to computer so that even if there was any misshapen we won’t loose data and free to format out mobile and SD card.

Root Micromax canvas A1:

You can install CM11 or any other new OS in Android mobile only after getting root access for your mobile.

STEP 1:  Backup your Device (Contacts, Sms, WhatsApp to external SD card (Compulsory backup) and Backup External SD card to a computer or Pendrive (Optional Backup).

STEP 2: Download

If your current OS is Android Kitkat then Download this. Android 4.4 KitKat Super SU file = http://download.chainfire.eu/396/Supe…   If that link is not available then download from Our Server.

If your current OS is Android Lollipop then Download this. Android 5.1 Lollipop Super SU file= http://download.chainfire.eu/696/Supe…  If that link is not available then download from Our Server.

Paste it in root folder in SD card

STEP 3: Install ADB toggle in your android mobile. Open the application and Turn on USB debugging on the device. Software is available in http://adbdriver.com/downloads/  (Download ADB toggle from our server)

STEP 4: Connect your phone to PC and run ADB Driver Installer software and install drivers. Software is available in http://adbdriver.com/downloads/  (Download ADB Driver from our server)

STEP 5: Power off the mobile phone. Press Power button and Volume + button at the same time so that to open bootloader mode.

Root Micromax Canvas A1

STEP 6: Select Fastboot mode by clicking Volume – button

STEP 7: Download Android_One_Bootloader_Unlocking_Script. -> extract or unzip the folder

STEP 8: Open the folder ‘Android_One_Bootloader_Unlocking_Script’ and Left click on the empty space of that folder by holding Shift key

STEP 9: Select ‘Open command window here’

STEP 10: Connect your device and type ‘fastboot devices’ on the command. If the device is detected then you will get some hexadecimal numbers and fastboot text. If nothing appears repeat from step 3.

STEP 11: Type  ‘fastboot oem unlock’ and hit enter

STEP 12: type ‘fastboot format userdata’

STEP 13: type ‘fastboot reboot’

Your device will reboot now. Then power off you mobile once again and then Press Power button and Volume + button at the same time so that to open bootloader mode.

STEP 14: Download CWM RECOVERY.zip= https://www.androidfilehost.com/?fid=23681161096069936  (Our Server Mirror)

Copy this recovery.img file to the folder ‘Android_One_Bootloader_Unlocking_Script’

Connect your android device to PC if you have disconnected to reboot mobile.

STEP 15:  Type ‘fastboot boot recovery.img’

STEP 16: Now in your Micromax Canvas A1 mobile choose ‘Install Zip’ –> ‘Choose zip from external SD card’ –> Select Super SU file copied in Step 2

After installation completed ‘go back’ –> ‘Reboot System now’

Success: You have successfully rooted your Micromax Canvas A1 mobile!!

Verify: To check that download root checker basic application in your android mobile and click verify.  https://play.google.com/store/apps/details?id=com.joeykrim.rootcheck&hl=en


2. Install CM11

STEP 1: Download CM11 (Download from our server).  Paste it in root folder in SD card.

STEP 2: Power off the mobile phone. Press Power button and Volume + button at the same time so that to open bootloader mode.

STEP 3: Select Fastboot mode by clicking Volume – button

STEP 4: Open the folder ‘Android_One_Bootloader_Unlocking_Script’ and Left click on the empty space of that folder by holding Shift key

STEP 5: Select ‘Open command window here’

STEP 6: Connect your device and type ‘fastboot devices’ on the command. If the device is detected then you will get some hexadecimal numbers and fastboot text.

STEP 7:  Type ‘fastboot boot recovery.img’

STEP 8: Now in your Micromax Canvas A1 mobile choose ‘Clear user data’ (Wipe Data / Factory Reset).

STEP 9: After the wipe process completes, return to main Recovery menu.

STEP 10:  choose ‘Install Zip’ –> ‘Choose zip from external SD card’ –> Select CM11 copied in Step 1

After installation completed ‘go back’ –> ‘Reboot System now’

Success: You have successfully installed with CM11!!

Hope this post helps newbies to install CM11. If you find anything hard or contradiction just feel free to comment below.

You May Also Like:

  • Lollipop to Kitkat in Micromax Canvas A1
  • How To Root Micromax Canvas A1 (Android One)
  • How To flash Stock ROM using SP Flash Tool

Filed Under: Android Tagged With: Android One, Custom ROM, How to

How to Root Micromax Canvas A1 (Android one)

August 29, 2016 by Gokul Deepak S Leave a Comment

I was just a newbie when I rooted my device. XDA forum had the answer for how to root Micromax Canvas A1 which only an expert can understand. I did a lot of google and the found the answers. I’m writing each step clearly in this blog so that even a novice can root his mobile, That’s the reason why this post has a lot of steps. All the steps are very easy one. Noobs just excuse me and please skip known steps.

Note: Warranty may be void of your device if you root Micromax Canvas Android one

How to Root Micromax Canvas A1:

STEP 1:  Backup your Device (Contacts, Sms, WhatsApp to external SD card (Compulsory backup) and Backup External SD card to a computer or Pendrive (Optional Backup).

STEP 2: Download

If your current OS is Android Kitkat then Download this. Android 4.4 KitKat Super SU file = http://download.chainfire.eu/396/Supe…   If that link is not available then download from Our Server.

If your current OS is Android Lollipop then Download this. Android 5.1 Lollipop Super SU file= http://download.chainfire.eu/696/Supe…  If that link is not available then download from Our Server.

Paste it in root folder in SD card

STEP 3: Install ADB toggle in your android mobile. Open the application and Turn on USB debugging on the device. Software is available in http://adbdriver.com/downloads/  (Download ADB toggle from our server)

STEP 4: Connect your phone to PC and run ADB Driver Installer software and install drivers. Software is available in http://adbdriver.com/downloads/  (Download ADB Driver from our server)

STEP 5: Power off the mobile phone. Press Power button and Volume + button at the same time so that to open bootloader mode.

Root Micromax Canvas A1


STEP 6: Select Fastboot mode by clicking Volume – button

STEP 7: Download Android_One_Bootloader_Unlocking_Script. -> extract or unzip the folder

STEP 8: Open the folder ‘Android_One_Bootloader_Unlocking_Script’ and Left click on the empty space of that folder by holding Shift key

STEP 9: Select ‘Open command window here’

STEP 10: Connect your device and type ‘fastboot devices’ on the command. If the device is detected then you will get some hexadecimal numbers and fastboot text. If nothing appears repeat from step 3.

STEP 11: Type  ‘fastboot oem unlock’ and hit enter

STEP 12: type ‘fastboot format userdata’

STEP 13: type ‘fastboot reboot’

Your device will reboot now. Then power off you mobile once again and then Press Power button and Volume + button at the same time so that to open bootloader mode.

STEP 14: Download CWM RECOVERY.zip= https://www.androidfilehost.com/?fid=23681161096069936  (Our Server Mirror)

Copy this recovery.img file to the folder ‘Android_One_Bootloader_Unlocking_Script’

Connect your android device to PC if you have disconnected to reboot mobile.

STEP 15:  Type ‘fastboot boot recovery.img’

STEP 16: Now in your Micromax Canvas A1 mobile choose ‘Install Zip’ –> ‘Choose zip from external SD card’ –> Select Super SU file copied in Step 2

After installation completed ‘go back’ –> ‘Reboot System now’

Success: You have successfully rooted your Micromax Canvas A1 mobile!!

Verify: To check that download root checker basic application in your android mobile and click verify.  https://play.google.com/store/apps/details?id=com.joeykrim.rootcheck&hl=en

You May Also Like:

  • Lollipop to Kitkat in Micromax Canvas A1
  • How To Install CM 11 (Cyanogenmod 11) in Micromax Canvas A1
  • How To flash Stock ROM using SP Flash Tool

Filed Under: Android Tagged With: Android One, How to, Rooting

How To Add Floating Facebook like box, Twitter Share, Google + box in blogger

August 29, 2016 by Gokul Deepak S Leave a Comment

Even Though there are many websites which explains about how to add floating facebook like box, twitter share box and google + box in blogger, I feel there was no clarity in any posts and also many failure rate was there.
I’m not only posting this to share with friends but also to remind myself how I did it.

How to add floating Facebook like box

  1. Go to Blogger Dashboard
  2. Go to Template –> Edit HTML
  3. Copy and paste this following text
You can put the code above right before the </body> tag of Blogger XHTML.

The position of the floating sharer will be relative to your blog size. So, you have to doodle with the top and left amount of pixels. If you want to put it on the right, you can change the word leftto right on the CSS codes (the codes inside the <style> and </style>).

You also can tinker and probably add another CSS styling to enhance the share buttons wrapper.

Even After using this code if facebook like box is not visible then it must be because of APP ID.
you should remove the facebook script from the above code. (<div id=”fb-root”>……)
Even after removing it if your blog doesn’t show facebook like box then it must be because there should be JavaScript SDK.
To add that
https://developers.facebook.com/docs/plugins/share-button
and type your website address in URL to share box and then select “Get Code”

add floating facebook like box javascript sdk
Paste the text which was highlighted by me in the blogger by following this method.
.
Using this code also gives me tips about hot to add a like button without using a URL and so the URL of current page will be automatically detected in the box. (I was searching for this but haven’t found at any websites/ Blogs)

Filed Under: Blogger Tagged With: How to

How to Show Only Post Title in Label Page

August 29, 2016 by Gokul Deepak S Leave a Comment

Sometimes we have show only post title in label page and in archive pages. I had a website for lyrics which should show only movie name list in the label page. so I have searched for this option and found this one.

This will save lot of space in the label page(a page after you clicked one of the label) and to boost the blog speed. Why? Because, usually if we want to find an article, and we didn’t find it in home page, we will search in label. But, if we click one of the label, we will be shown all of the content of each post in that label. So, we have to wait until the loading is complete. Long, right? So, the solution is, just follow the steps below.

Show Only Post Title in Label Page

How to Show Only Post Title In Label page:

  1. Go to blogger dashboard
  2. Go to Template –> Edit HTML
  3. Press ctrl+f to search for a text
  4. Then find <b:include data=’post’ name=’post’/>
  5. Replace the code above, with the code below.
    <b:if cond=’data:blog.homepageUrl != data:blog.url’>
    <b:if cond=’data:blog.pageType != &quot;item&quot;’>
    <a expr:href=’data:post.url’>
    <div style=’padding:6px 0 6px 5px;border-right:1.5px solid #000;border-bottom:1.5px solid #000;margin-bottom:2px;background:#E6E4E4;color:#000000;’><img alt=’&gt;&gt;&gt;’ border=’0′ src=’https://lh5.googleusercontent.com/-HP5XyclRQic/TXMMAKmlg5I/AAAAAAAAAQk/wrCGFu9jzmg/s1600/sidebar-icon.png’/>
    <data:post.title/></div></a>
    <b:else/>
    <b:include data=’post’ name=’post’/>
    </b:if>
    <b:else/>
    <b:include data=’post’ name=’post’/>
    </b:if>
    Customize:
    The Red code are the background color, you can edit or remove it
    The Blue code is the icon address
  6. Just click on Save Template

We have successfully changed code. Now go to a label page and test result.


————————————————
1) If you can’t find any text using ctrl+f just copy the text to notepad and then press ctrl+f and then paste it there.
2) If post contains any thumbnail images and if you want to show the thumbnails related to that post then replace this code instead of that Blue code
<img alt=’&gt;&gt;&gt;’ border=’0′ expr:src=’data:post.thumbnailUrl’/>
Click here to read more blogger tips

Filed Under: Blogger

How to remove Linux OS in Tamilnadu Government Free Laptop

August 29, 2016 by Gokul Deepak S 5 Comments

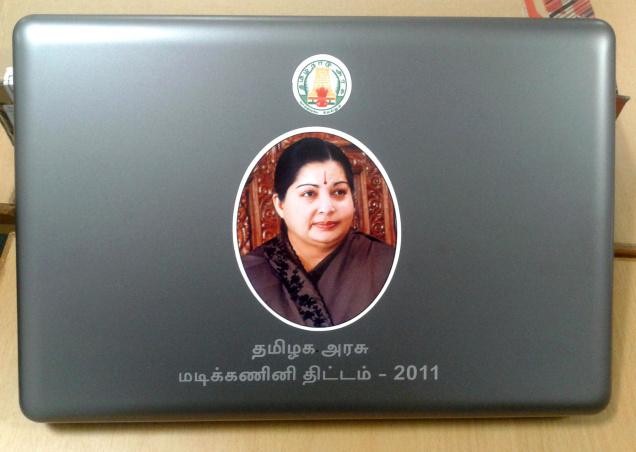
Tamilnadu Government have done a very great job by providing free laptops to Government & Government aided College Students and School Students. This Tamilnadu Government Free Laptop scheme has benefited many rural poor students and urban poor students.


Tamilnadu Government Free Laptop


The guys over at American College including myself got the Lenovo B460e in Tamilnadu Government Free Laptop scheme. Though it has some important stuff missing like bluetooth , web camera, internal wireless adaptor, dvd drive and such, I personally feel that its a pretty good piece especially for students. Government claims its price as Rs.14,000 and in black market it is available for Rs.12,000.

Remove Linux OS in Tamilnadu Government Free Laptop:

The lap comes with dual operating systems , Win 7 and BOSS Linux. I did some research to optimize the lap to my needs and decided to write a guide to make things easy for others. This guide will cover the following issues.

1. How to Change Account name from ELCOT to Your Name
2. How to change System Name From ELCOT to Your Name
3. Login Details for BOSS Linux.
4. How to remove BOSS Linux while retaining Windows 7.
5. How to remove GRUB and replace it with the normal Windows NT bootloader.
6. How to reallocate the 100gb previously used up by BOSS.
7. How to get rid of the annoying Drive Q, which gives the drive inaccessible error.
8. About the BIOS splashscreen with the TN Logo (For Tamilnadu Government free Laptop)

How to Change Account name from ELCOT to Your Name

Go to Start Menu -> Control Panel -> User Accounts -> Change your account name.
Simple!

How to change System Name From ELCOT to Your Name

Go to Start Menu
In the Search column type ” sysdm.cpl ”
Click ” Change ” button.
knock yourself out naming your pc, I personally prefer AlottaV Agina
Login Details for BOSS Linux (for TamilNadu Government Free Laptop)

‘username: root ‘
‘password: root ‘

How to remove BOSS Linux while retaining Windows 7:

Many of my friends have asked this doubts. Since they are good with Windows 7 they don’t need linux and the 100GB memory partitioned for linux is just a waste of memory and we can load some extra movies in that space 😛

First understand what happens when you boot your laptop. First BIOS gets running and then GRUB will load. GRUB is a multi OS bootloader which verifies lists of OS present in your computer and then will lists them


GRUB rescue for Tamilnadu Government Free Laptop


If there is linux and windows present in your computer/laptop then GRUB will be the boot loader. If you have windows XP and Windows 7 in your laptop then windows has its own bootloader called Windows NT bootloader.

Now we are deleting linux and going to maintain only windows. So we should change our bootloader too.

so here comes the question

How to remove GRUB and replace it with the normal Windows NT bootloader

How to reallocate the 100gb previously used up by BOSS Linux.

First Download the following: [ Free Software ]

-> Required EASEUS Partition Master – Home Edition – Click here to Download this Software

-> option 1 Grub for DOS [Free] Click here to Download
To download Scroll down, click register, put in your details and ou should be able to download the installation file.

OR

option 2 Testdisk [free] Click here to Download

This has two steps. RESTART ONLY AFTER COMPLETING BOTH STEPS

STEP 1 – Two options, choose one

Option 1 Process [ with EASY BCD 2.1.2 Community edition, this is easy and has GUI ]

-Run EASY BCD 2.1.2 Community edition
-Select BCD deployment
-In MBR Configuration options &gt; choose Install windows vista/7 bootloader to MBR
-Select Write MBR
Option 2 Process [ with Test Disk ] [bit complicated]

– First Start Testdisk_win.exe
– Next, Create a New Log File
– Select Your Media (Hard Drive with GRUB on it) [its Disk/dev/sda 320 gb/298 gb for TN Laptop] ,and “Proceed”
– Select Intel
– Select MBR Code

This has removed GRUB and replaced it with windows bootloader.

STEP 2
Process

– Start EASEUS Partition Master – Home Edition
– Click Go to main screen
-Select The last partition of 100gb capacity, EXT3 file system
– Right Click &gt; Delete Partition
– Now it shows Unallocated space . Right Click -> Create Partition , to create a new Patition E: .
– You can also merge it with C or D partition using the merge command
– Click Apply on left-top side of the menu bar

NOTE – DO NOT TOUCH THE 200MB NTFS PARTITION NAMED *: , IT CONTAINS WIN7 FILES

Done! Reboot your computer and it should now be done.
Now you are free of linux and have 100gb more space for yourself on windows.

How to get rid of the annoying [hide] Drive Q, which gives the drive inaccessible error

The presence of the Drive Q: is because of the“Click-To-Run” Office 2010. Though it is harmless, it can get quite irritating when you accidentally click it while browsing through the system.
Here’s how to hide it.
Process

-Go to Start Menu

-In the Search column type ” Regedit ” . Open the program regedit.exe
-Go to HKEY_CURRENT_USERSoftwareMicrosoftWindowsCurrentVersionPoliciesExplorer
If you don’t have the EXPLORER folder in POLICIES,
right click Policies -> New -> Key . Name it as ” Explorer ”

– Open the folder Explorer

– Right Click inside the bigger column on the Right-> New -> DWORD 32bit Value

– Name it as ” NoDrives ” . Right Click it -> Modify… -> input Value Data as ” 65536 ” -> choose base as “Decimal ” -> Click ok

Restart and the drive should be gone. Simple as that.

About the BIOS splash screen with the TN Logo

All laptops given under Tamilnadu Government Free Laptop scheme has I was reading up about changing the TN boot screen but it apparently needs fidgetin with the BIOS , which is not recommended anywhere. Any screw-ups and your motherboard gets bricked.
Guess I can live with the 2 sec reminder of the donor of the laptop.

Filed Under: Laptop Tips

How to Remove Powered By Blogger Attribution in Blogger

August 29, 2016 by Gokul Deepak S Leave a Comment

Every one of us does not like ‘Powered By Blogger’ Attribution shown in the footer of the blog created in blogger.com. So I have searched a lot to know how to remove powered by blogger attribution in blogger. Just sharing the solution which I have found by googling.

How to remove Powered by Blogger Attribution:

Mission: Remove Powered by Blogger Attribution in Blogger

Procedure:

Remove Powered by Blogger Attribution

Step 1: Go to Blogger Dashboard

Step 2: Click on Template

Step 3: Click on Edit HTML button.

Now change the true to false. Once you change the code will look like this:

Step 5: Save your template.
Remove Powered by Blogger Attribution
Step 6: Now Go to layout and find the attribution widget.

Step 7: Click on Edit on that attribution widget

Step 8: Now click on the Remove button.

Climax: Mission Successful.
Click here to know more Blogger Tips.

Filed Under: Blogger

  • « Go to Previous Page
  • Page 1
  • Interim pages omitted …
  • Page 7
  • Page 8
  • Page 9
  • Page 10
  • Page 11
  • Go to Next Page »

Primary Sidebar

Popular Pages

  • How to install OwnCloud on Bluehost
  • Home
  • How to find the date of the Facebook group it was created
  • How to Stock ROM using SP flash

Archives

Categories

  • Android
  • Apache
  • AWS
  • Blogger
  • Computer Tips
  • DevOps
  • Docker
  • Earn
  • Facebook Tips
  • Git
  • Google Tips
  • Hosting
  • How to
  • Laptop Tips
  • Laptops
  • Linux
  • Mobile
  • MongoDB
  • Nginx
  • Node JS
  • Notepad++
  • PostgresQL
  • Terraform
  • Ubuntu
  • Wordpress
  • Xenforo

Tags

Android Android One AWS Bluehost Comparisions Custom ROM Elementor Facebook Genesis Genesis Sample Theme Google Drive How to Lineage OS Notes OnePlus One OwnCloud Rooting Smartphones Stock ROM Studiopress Tomcat Wordpress plugin

Copyright © 2025 · Maintained by GokulDeepak


Loading Comments...